博客修改微调记录
前言
本篇文章记录了博客修改微调的一些记录,包括添加新功能、修改样式、优化代码等,主要是怕自己又忘了,记录一下。部分参考Akiler。
正文
代码块高亮样式修改
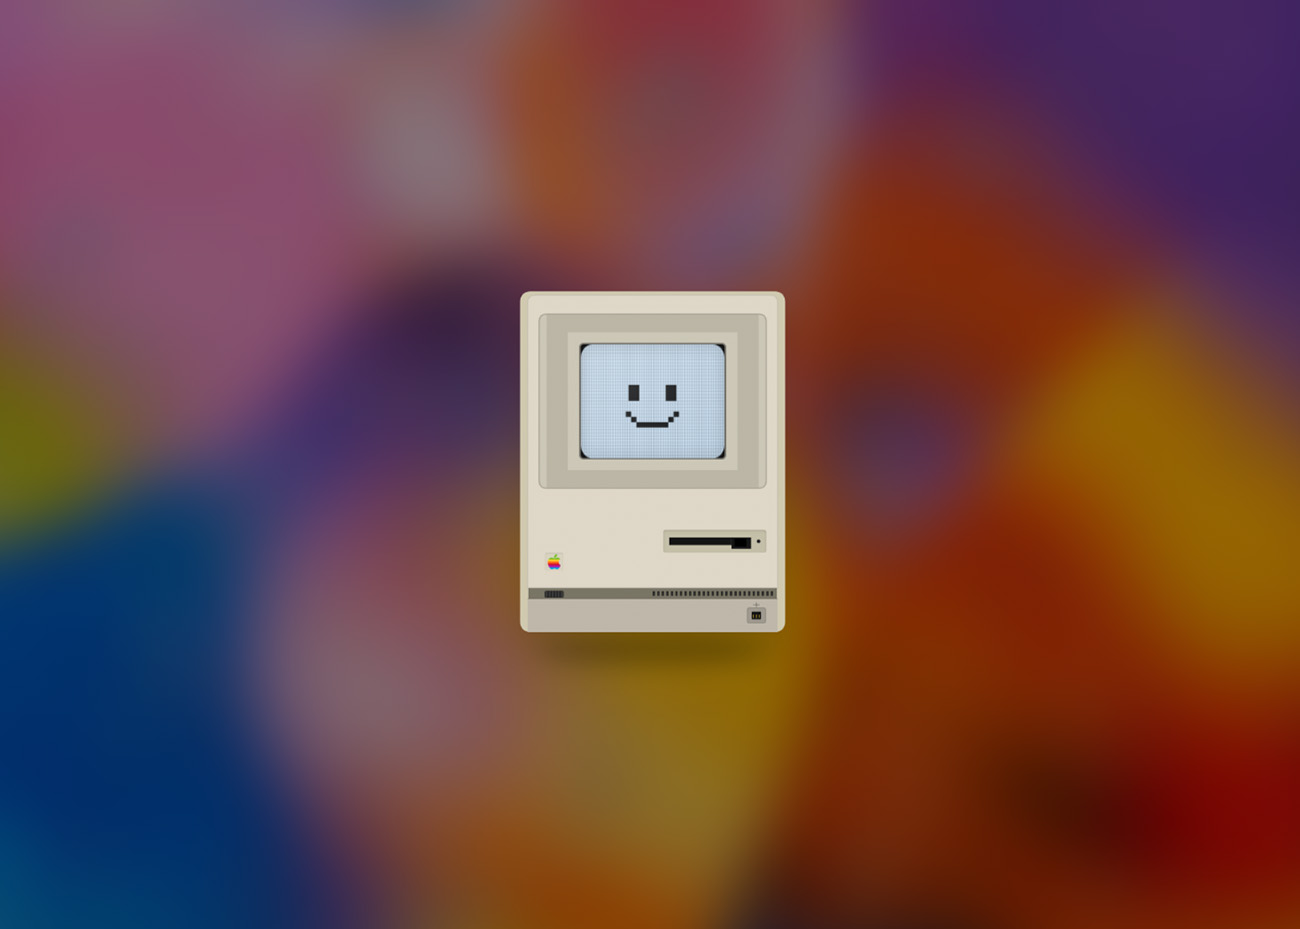
效果预览
- 一个毛玻璃效果的代码块高亮样式,并适配暗色模式,配合
post透明或毛玻璃背景效果较好。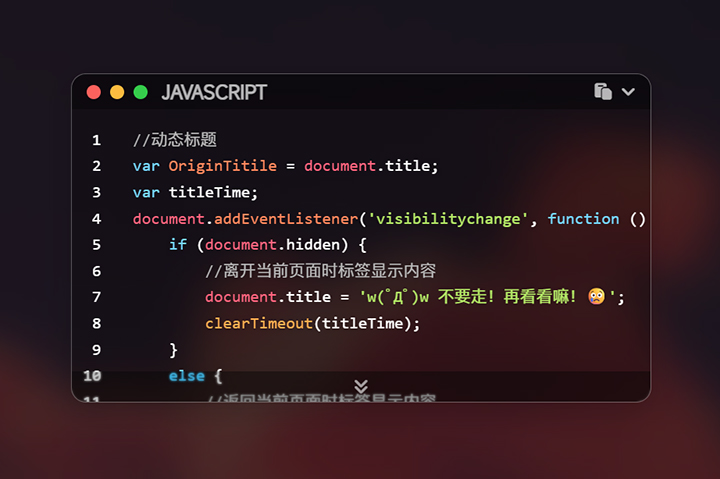
- 在
[Blogroot]\_config.butterfly.yml中找到code_blocks配置项,修改theme为false关闭默认高亮样式:1
2
3
4
5
6
7code_blocks:
# Code block theme: darker / pale night / light / ocean / false
theme: false
macStyle: true
# Code block height limit (unit: px)
height_limit: 250
word_wrap: false - 在
[Blogroot]\_config.yml中找到highlight配置项,修改hljs为true:1
2
3
4
5
6highlight:
line_number: true
auto_detect: false
tab_replace: ''
wrap: true
hljs: true - 在
[Blogroot]\themes\butterfly\source\css\custom\目录下新建highlight.css文件:1
2
3
4
5
6
7
8
9
10
11
12
13
14
15
16
17
18
19
20
21
22
23
24
25
26
27
28
29
30
31
32
33
34
35
36
37
38
39
40
41
42
43
44
45
46
47
48
49
50
51
52
53
54
55
56
57
58
59
60
61
62
63
64
65
66
67
68
69
70
71
72
73
74
75
76
77
78
79
80
81
82
83
84
85
86
87
88
89
90
91
92
93
94
95
96
97
98
99
100
101
102
103
104
105
106
107
108
109
110
111
112
113
114
115
116
117
118
119
120
121
122
123
124
125
126
127
128
129
130
131
132
133
134
135
136
137
138
139
140/* 新添加的內容
-------------------------------------
--hl-color 代碼框字體顔色 【必須】 (把下面.hljs的 color複製到這裏來)
--hl-bg 代碼框背景色 【必須】 (把下面.hljs的 background複製到這裏來)
--hltools-bg: #321a0f 代碼框頂部工具欄背景色 【可選】(如果你關掉了 copy、lang 和 shrink,可不用配置這個)
--hltools-color: #fff 代碼框頂部工具欄字體顔色 【可選】(如果你關掉了 copy、lang 和 shrink,可不用配置這個)
--hlnumber-bg: #221a0f 代碼框行數背景色 【可選】(如果已經關掉 line_number,可以不用配置這個)
--hlnumber-color: #fff 代碼框行數字體顔色 【可選】 (如果已經關掉 line_number,可以不用配置這個)
--hlscrollbar-bg: #d3af86 代碼框滾動條顔色 【可選】(默認為主題主顔色)
--hlexpand-bg: #d3af86 代碼框底部展開背景色 【可選】(如果已經關掉 highlight_height_limit,可以不用配置這個)
*/
:root {
--hl-color: #d3af86;
--hl-bg: rgba(255, 255, 255, 0.25);
--hltools-bg: ;
--hltools-color: #fff;
--hlnumber-bg: transparent;
--hlnumber-color: #fff;
--hlscrollbar-bg: #fff;
--hlexpand-bg: rgba(255, 255, 255, 0.15);
}
/* 代码块自定义样式 */
.highlight {
background: rgba(255, 255, 255, 0.25) !important;
border-radius: 0.8rem !important;
border: 1px solid rgba(255, 255, 255, 0.3);
box-shadow:
0 4px 30px rgba(0, 0, 0, 0.1),
0 10px 20px rgba(0, 0, 0, 0.1) !important;
/* backdrop-filter: blur(1px) saturate(170%);
-webkit-backdrop-filter: blur(1px) saturate(170%); */
}
.container .highlight-tools {
background: rgba(255, 255, 255, 0.4);
}
.container figure.highlight table td.gutter pre,
.container figure.highlight table td.code pre {
background: transparent !important;
}
.code-expand-btn {
background: rgba(255, 255, 255, 0.05) !important;
backdrop-filter: blur(1px) saturate(170%);
-webkit-backdrop-filter: blur(1px) saturate(170%);
box-shadow:
0 4px 30px rgba(0, 0, 0, 0.1),
0 10px 20px rgba(0, 0, 0, 0.1) !important;
}
[data-theme="dark"] .highlight {
background: rgba(0, 0, 0, 0.25) !important;
}
[data-theme="dark"] .container .highlight-tools {
background: rgba(0, 0, 0, 0.35);
color: rgba(255, 255, 255, 0.7);
}
[data-theme="dark"] .code-expand-btn {
background: rgba(0, 0, 0, 0.15) !important;
}
/* Kimbie Comment */
.hljs-comment,
.hljs-quote {
color: #b7b7b7;
}
/* Kimbie Red */
.hljs-variable,
.hljs-template-variable,
.hljs-tag,
.hljs-name,
.hljs-selector-id,
.hljs-selector-class,
.hljs-regexp,
.hljs-meta {
color: #ff657f;
}
/* Kimbie Orange */
.hljs-number,
.hljs-built_in,
.hljs-builtin-name,
.hljs-literal,
.hljs-type,
.hljs-params,
.hljs-deletion,
.hljs-link {
color: #ffae51;
}
/* Kimbie Yellow */
.hljs-title,
.hljs-section,
.hljs-attribute {
color: #ff885d;
}
/* Kimbie Green */
.hljs-string,
.hljs-symbol,
.hljs-bullet,
.hljs-addition {
color: #b3e766;
}
/* Kimbie Purple */
.hljs-keyword,
.hljs-selector-tag,
.hljs-function {
color: #76d8ff;
}
/* 更改的內容 把.hljs改為 #article-container figure.highlight .hljs *、
/* ------------------------------------- */
#article-container figure.highlight .hljs {
display: block;
overflow-x: auto;
color: #ffffff;
padding: 0.5em;
text-shadow: 0px 0px 5px rgba(0, 0, 0, 0.2);
}
[data-theme="dark"] #article-container figure.highlight .hljs {
background: transparent;
}
.hljs-emphasis {
font-style: italic;
}
.hljs-strong {
font-weight: bold;
} - 在
[Blogroot]\_config.butterfly.yml的inject配置项引入highlight.css:1
2
3
4
5
6inject:
head:
# - <link rel="stylesheet" href="/xxx.css">
+ - <link rel="stylesheet" href="/css/custom/highlight.css">
bottom:
# - <script src="xxxx"></script>
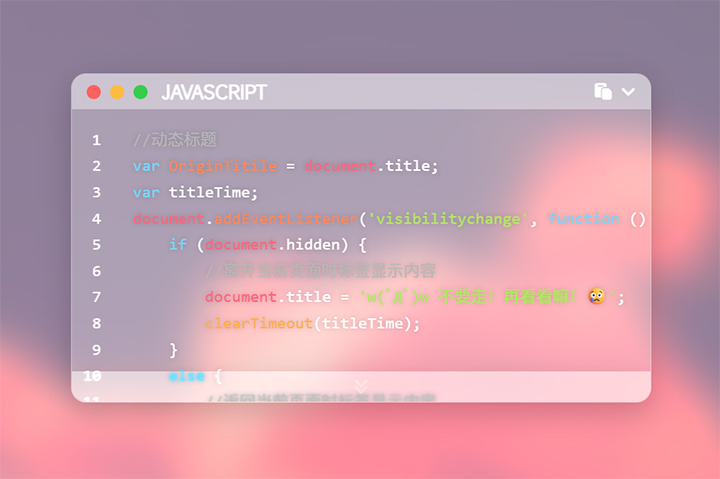
站点动态title
效果预览
- 站点动态title是通过js监测是否聚焦于当前页面,从而替换标签显示内容。

- 在
[Blogroot]\themes\butterfly\source\js\目录下新建diytitle.js文件:1
2
3
4
5
6
7
8
9
10
11
12
13
14
15
16
17
18//动态标题
var OriginTitile = document.title;
var titleTime;
document.addEventListener('visibilitychange', function () {
if (document.hidden) {
//离开当前页面时标签显示内容
document.title = 'w(゚Д゚)w 不要走!再看看嘛!😢';
clearTimeout(titleTime);
}
else {
//返回当前页面时标签显示内容
document.title = '♪(^∇^*)欢迎回来!😘' + OriginTitile;
//两秒后变回正常标题
titleTime = setTimeout(function () {
document.title = OriginTitile;
}, 2000);
}
}); - 在
[Blogroot]\_config.butterfly.yml的inject配置项引入diytitle.js,此处因为这是个体量极小的独立js,所以可以添加async异步加载标签:1
2
3
4
5
6inject:
head:
# - <link rel="stylesheet" href="/xxx.css">
bottom:
# - <script src="xxxx"></script>
+ - <script async src="/js/custom/diytitle.js"></script>- 我的自定义文件存放在
css/custom/和js/custom/目录下,根据实际情况修改路径。
- 我的自定义文件存放在
随机背景及渐显加载
效果预览
butterfly主题使用id为web_bg的div来存放背景图片,只需要通过重设这个div的背景图片属性就可以替换背景图片。
- 在
[Blogroot]\themes\butterfly\source\js\目录下新建randombg.js文件:1
2
3
4
5
6
7
8
9
10
11//随机背景图片数组,图片可以换成图床链接,注意最后一条后面不要有逗号
var backimg =[
"url(/img/bg1.JPG)",
"url(/img/bg2.jpg)",
"url(/img/bg3.jpg)",
"url(/img/bg4.jpg)"
];
//获取背景图片总数,生成随机数
var bgindex =Math.floor(Math.random() * backimg.length);
//重设背景图片
document.getElementById("web_bg").style.backgroundImage = backimg[bgindex];- 这里适合一图流使用,不涉及更换banner。
- 在
custom.css中添加如下代码,实现渐显加载效果:1
2
3
4
5
6
7
8
9
10
11
12
13
14
15
16
17
18
19
20
21
22/*3s为加载动画的时间,1为加载动画的次数,ease-in-out为动画效果*/
#web_bg {
-webkit-animation: imgblur 3s 1 ease-in-out;
animation: imgblur 3s 1 ease-in-out;
}
@keyframes imgblur {
0% {
filter: blur(5px);
}
100% {
filter: blur(0px);
}
}
/*适配使用-webkit内核的浏览器 */
@-webkit-keyframes imgblur {
0% {
-webkit-filter: blur(5px);
}
100% {
-webkit-filter: blur(0px);
}
}- 如果还没有
custom.css文件,就在[Blogroot]\themes\butterfly\source\css\目录下新建一个。
- 如果还没有
- 在
[Blogroot]\_config.butterfly.yml的inject配置项引入randombg.js:1
2
3
4
5inject:
head:
- <link rel="stylesheet" href="/css/custom/custom.css" media="defer" onload="this.media='all'">
bottom:
- <script async data-pjax src="/js/custom/randombg.js"></script>- 我的自定义文件存放在
css/custom/和js/custom/目录下,根据实际情况修改路径;其中async属性提供异步加载减少Html阻塞。
- 我的自定义文件存放在
公祭日自动变灰
效果预览
- 站点公祭日自动变灰判定是通过
js监测当前日期是否为公祭日,从而调整html的filter属性使站点变灰。
- 在
[Blogroot]\themes\butterfly\source\js\目录下新建grayscale.js文件:1
2
3
4
5
6
7
8
9
10
11
12
13
14
15
16
17
18
19
20
21
22
23
24
25
26
27
28
29
30
31
32
33
34
35
36if(PublicSacrificeDay()){
document.getElementsByTagName("html")[0].setAttribute("style","filter:gray !important;filter:grayscale(100%);-webkit-filter:grayscale(100%);-moz-filter:grayscale(100%);-ms-filter:grayscale(100%);-o-filter:grayscale(100%);");
}
function PublicSacrificeDay(){
var PSFarr=new Array("0403","0404","0405","0406","0414","0512","0707","0807","0814","0909","0918","0930","1025","1213");
//2020年4月4日 新冠肺炎哀悼日,清明节
//2010年4月14日,青海玉树地震
//2008年5月12日,四川汶川地震
//1937年7月7日,七七事变 又称卢沟桥事变
//2010年8月7日,甘肃舟曲特大泥石流
//8月14日,世界慰安妇纪念日
//1976年9月9日,毛主席逝世
//1931年9月18日,九一八事变
//烈士纪念日为每年9月30日
//1950年10月25日,抗美援朝纪念日
//1937年12月13日,南京大屠杀
var currentdate = new Date();
var str = "";
var mm = currentdate.getMonth()+1;
if(currentdate.getMonth()>9){
str += mm;
}else{
str += "0" + mm;
}
if(currentdate.getDate()>9){
str += currentdate.getDate();
}else{
str += "0" + currentdate.getDate();
}
if(PSFarr.indexOf(str)>-1){
return 1;
}else{
return 0;
}
} - 在
[Blogroot]\_config.butterfly.yml的inject配置项引入grayscale.js,此处因为这是个体量极小的独立js,所以可以添加async异步加载标签:1
2
3
4
5
6inject:
head:
# - <link rel="stylesheet" href="/xxx.css">
bottom:
# - <script src="xxxx"></script>
+ - <script async src="/js/custom/grayscale.js"></script>- 我的自定义文件存放在
css/custom/和js/custom/目录下,根据实际情况修改路径。
- 我的自定义文件存放在
后记
后续还会有一些其他的微调记录,再补充。
相关推荐

2026-01-28
右侧菜单栏全局aplayer播放器
将吸底aplayer移至右侧菜单栏并统一样式

2025-12-10
css小幽灵系列加载动画
前言本教程是通过修改源码,替换默认加载动画的形式实现,并非在原有的基础上再添加。如果想要有好几个加载动画,随时可切换的话,可以参考Akilar店长关于Butterfly添加多个加载动画 的教程。 更新日志 更新日志 2026.01.19 整体修改新版本butterfly的pug文件 2025.12.14 新增SVG小幽灵加载动画 2025.12.12 新增爱心小幽灵加载动画、发光小幽灵加载动画 2025.12.10 新增带小星星的小幽灵加载动画 教程带星星小幽灵 带星星小幽灵加载动画预览 ...

2026-01-20
通过Docker私有部署Twikoo至服务器(宝塔面板)
通过Docker私有部署Twikoo至服务器

2025-12-09
aplayer吸底插件高斯模糊样式及适配深色模式
此教程强制关闭了歌词和歌词按钮,需要歌词的请酌情修改。 修改后样式预览 修改aplayer吸底插件高斯模糊样式并适配深色模式 以Butterfly主题为例,在[Blogroot]\themes\butterfly\source\css\路径下新建_custom文件夹,在此文件夹下新建custom.css,并在主题配置文件inject配置项head处引入,如果已经有了请忽略此步骤。 123inject: head:+ - <link rel="stylesheet" href="/css/_custom/custom.css" media="defer" onload="this.media='all'"> 将以下添加高斯模糊效果的代码粘贴至刚建的custom.css中。 1234567891011121314151617181920212...

2025-12-18
星球大战BB-8加载动画
前言本教程是通过修改源码,替换默认加载动画的形式实现,并非在原有的基础上再添加。如果想要有好几个加载动画,随时可切换的话,可以参考Akilar店长关于Butterfly添加多个加载动画 的教程。 BB-8加载动画预览 教程 修改 [Blogroot]\themes\butterfly\layout\includes\loading\fullpage-loading.pug,复制以下代码替换源文件。12345678910111213141516#loading-box .bb8-loadingWarp .loading-bb8script(async). var preloader = { endLoading: () => { document.body.style.overflow = 'auto'; document.getElementByI...
2026-01-11
如何为Hexo博客添加一个可爱的麦金塔小电脑加载动画
通过替换默认动画源码修改加载动画
评论